We all know that we need to backup our website, but the question is always how. This tutorial covers using an excellent and free backup tool, BackWPup. BackWPup also has a paid version if you need additional features (but most people will do just fine with the free version).
Note: Original version was published in April 2013, the most recent update was published January 2016. The new version now lets you watch the complete video instructions.
[anphira_blog_cta]
Why Backup?
A number of hosting services provide backups to your website, so why should you go to the extra effort to make your own backups? Well, here are a few reasons.
- While hosting services do backup items, it can be 24-48 hours between backups, and you have no control over when they do it. So if you want a backup before you make a major change to your site, you have to leave your site static for two days first.
- If there is a problem, most services will only do one free backup restore per period (and their length of period can range from 3 months to a year). There is also a delay between contacting tech support and the restore actually happening (that could also possibly take two days).
- With their backups, all of your data is still on THEIR servers. You don’t have any direct access. With your own backups, you have direct access anytime you want to your data.
- If you are planning some big site changes, you want to test those at a test location, which means you need a full backup copy of your website.
- If you change hosting services, you need a full copy of your website to setup at the new host before your domain gets pointed to the new hosting service.
Installing BackWPup
If you need help following these instructions for installation, watch the video above.
To get started, head over to your WordPress site and select Plugins from the left side menu. At the top of the page click on “Add new”.
In the Search box enter “BackWPup” and click on “Search Plugins”.
Then click on “Install Now” and when asked if you are sure you want to install the plugin, say yes.
Once BackWPup has installed, click on Activate Plugin.
You will then be taken to the Welcome page. Click on the Jobs on the left side menu to get started.
Creating a Job
To create a new BackWPup job click on “Add New” at the top of the BackWPup Jobs page. At the top of the New Job screen you will see a row of 5 tabs. We will start with the General tab.
General Settings

First you will enter a Job Name. This should be something descriptive like “Weekly File & Database Backup” where Website is the name of your site.

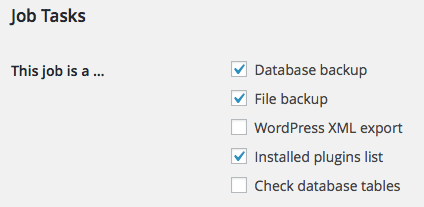
The next item is Job Tasks. WordPress XML is useful if you plan to do an import into another WordPress location (such as a test site to test out new features).
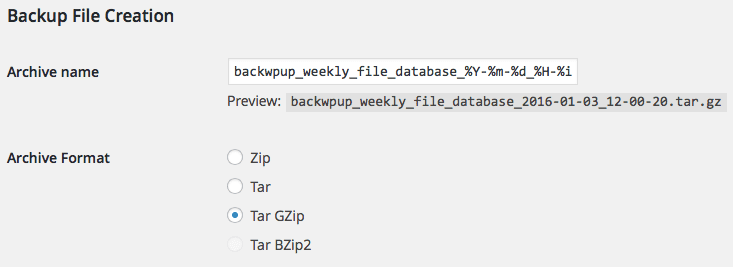
Backup File Creation will name your backup and determine the compression used. I recommend leaving the compression at Tar GZip. You can change the first part the name to something more descriptive (like backup_weekly_files_database), but I would recommend leaving the date and time alone as those let you know when the backup was taken. “%Y-%m-%d_%H-%i-%s” stands for year, month, day, hour, minute, second.
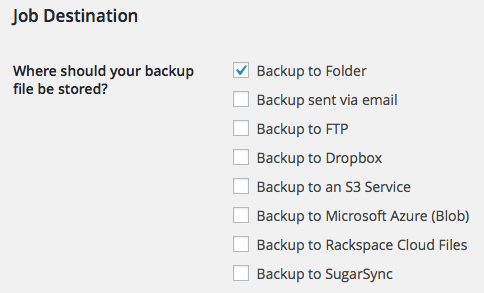
Backing up to Local Storage (Folder)
Job Destination allows you to select where you would like your backup saved. For the first example in the video above, I show you how to backup with local storage. I generally recommend backing up to remote storage as that separates your backups from your site, but local storage is a lot better than nothing!
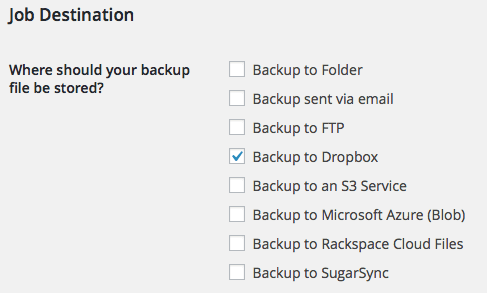
Backing up to Dropbox
A great location is Dropbox (if you don’t have Dropbox, this link will get you an extra 500MB when you sign up for a free account). The cloud storage also syncs to my computer which in turn has it’s own backup system. Did I mention I really like backing up?
Log Files will email you if there is an error backing up. If you don’t get an email, it means everything is proceeding normally. If you would like to be emailed after every backup, uncheck the “Errors only” box. BackWPup will enter in the website admin email address, but you can change this if desired. When you are done with your settings for this page, click on “Save changes”.
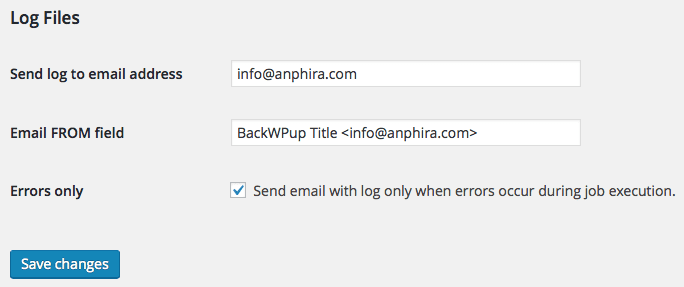
After you click on “Save changes” you’ll receive a notice that your changes have been saved.
[anphira_blog_cta]
Schedule Settings
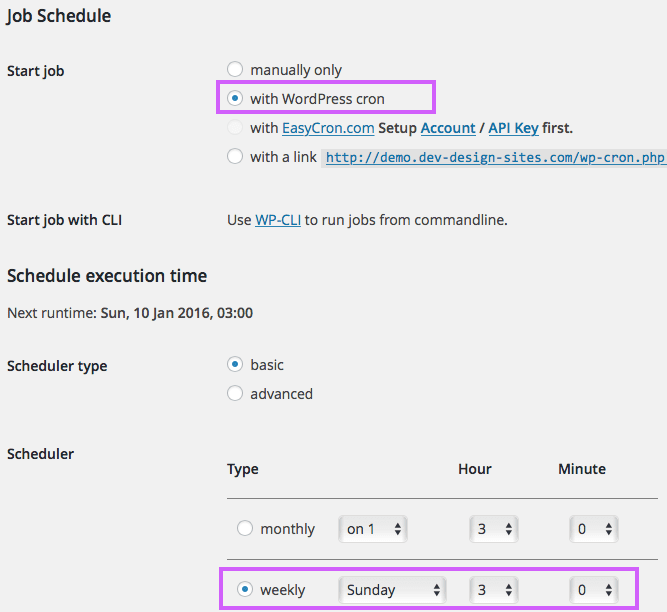
The easiest way to schedule backups is to have them performed automatically. To do this simply select the “with WordPress cron” option.
When scheduling backups, you want to do so at a time when you are unlikely to be making changes. So I like to schedule jobs to happen in the middle of the night. Alternately, you can schedule your job for a time when your site has its lowest number of visitors.
Database Backup
Now that you have your schedule set up, it’s time to check the settings for your database backup. To do so, click on the “DB Backup” tab.
The first setting you will want to set up is what tables in your database you want to have backed up. Some sites will have a very small number of tables, while others could have 100 tables. The tables for your core WordPress data will begin with the same prefix. That prefix is by default “wp_”, however for security reasons you will not normally have that prefix.
If you are not sure what your WordPress table prefix is, it is the name on the third button after the “all” and “none” buttons. Some WordPress plugins will store their data in tables that begin with the same prefix as your WordPress data. Others, however, may store their data in tables with different prefixes. There may also be other database tables which have purposes separate from WordPress. If there are tables that you are unsure of, ask your webmaster.
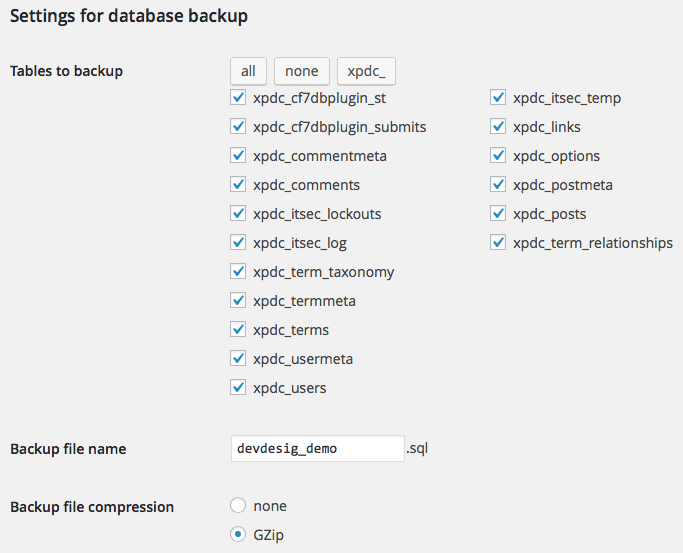
Backup file name will be the name of the database backup file. This will default to whatever the name of your database is. If this name doesn’t make any sense, you can change it. I would recommend only using letters, numbers, and underscores in the name. Don’t use spaces.
The last setting is backup file compression. I recommend compressing with GZip, it reduces the size of the resulting file.
Files Settings
Now that you have set up BackWPup to backup your database, you need to backup your WordPress files.
The Files tab allows you to do that. The first settings are for Folders to backup.
By default BackWPup will backup your WordPress install, your content, your plugins, your themes, and your uploads. If you have extra folders in your root directory, you may or may not want them to be backed up. Items in your content folder don’t usually change very often, nor do your themes. Since I don’t use the WordPress default theme (twentyfifteen), I have chosen to exclude that from backups.
Your uploads folder is where uploaded images go, I would recommend backing this up regularly. If your uploads folder is particularly large consider making a permanent copy of older folders (previous years) and not including those in your regular backup.
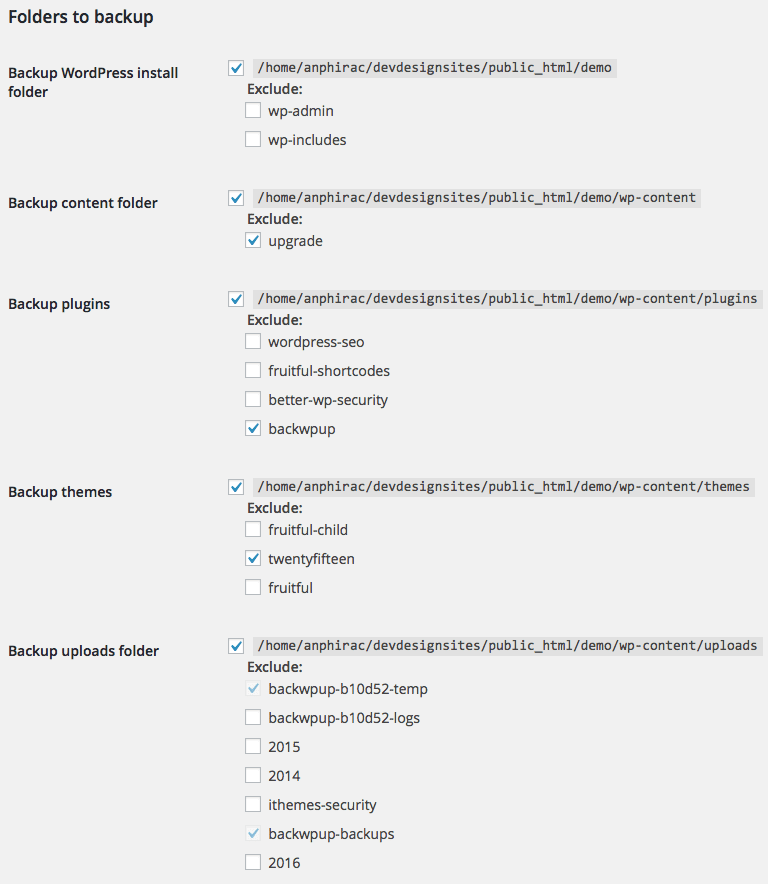
After you have selected your folders to backup, you will now be asked if you want to exclude items from backup. I normally leave these settings with the default settings.
The last section of files is special files. These include your configuration file as well as some specific access files. These files are normally small, and I would recommend backing them up.
Plugins Settings
On the general settings page under Job Tasks you may have selected to backup a list of plugins. If so, you will have a Plugins tab. This will save a list of the installed plugins. I normally do not make any changes here.
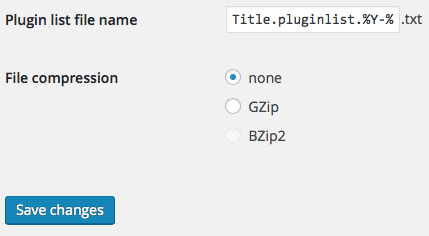
To:Folder
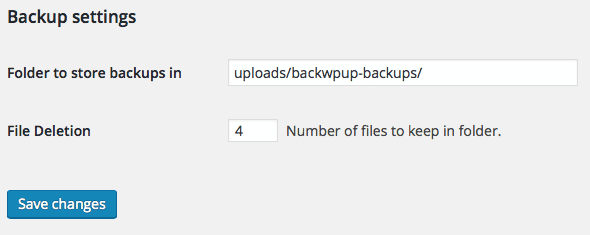
To: Dropbox Settings
I have selected to send my backups to Dropbox. Personally, I like Dropbox a lot. It is extremely easy to use and provides you with a free 2GB of storage. If you don’t have an account, you can sign up here and get an extra 500MB free.
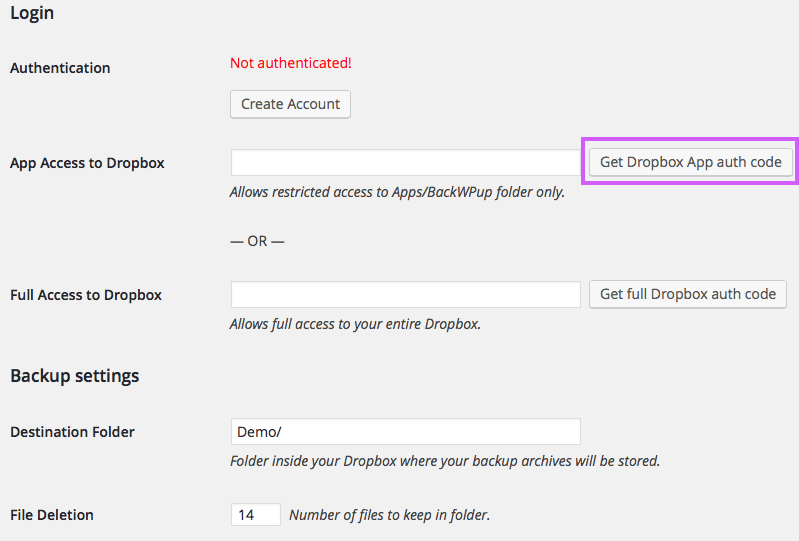
On the Dropbox tab you will see a notice that you need to Authenticate with Dropbox.
Click on “Get Dropbox App auth code” and login if needed. The difference between App access and full access is that in App access BackWPup only has access to a folder that it creates. If you choose full then BackWPup will have access to your entire Dropbox account.
After you click on Get Dropbox App auth code, you will be prompted by Dropbox to authorize BackWPup to connect with your Dropbox. You will need to click “Allow”.
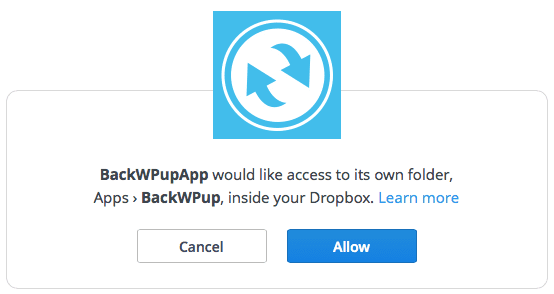
You will then get an authorization code to copy to the App Access to Dropbox line.
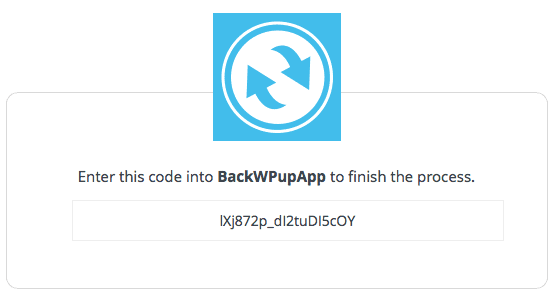
After entering the code, click on Save changes. Once Authenticated you will see green “Authenticated!” text in BackWPup.

Since I am setting up a Weekly backup schedule I will enter 3 as the files to keep. What will happen is once there are 3 files, every time a new backup is made, the oldest existing backup will be deleted. This helps to save space in my Dropbox by deleting old versions. When you have made your selections, click on “Save changes”.
List of Jobs
After you have created your first job, go to the Jobs page of BackWPup (left-hand menu).
Once on the Jobs page, you will see your available Jobs. In this example, I have two jobs created, a weekly and a daily. If I hover my mouse over the weekly job, a list of four options will appear.
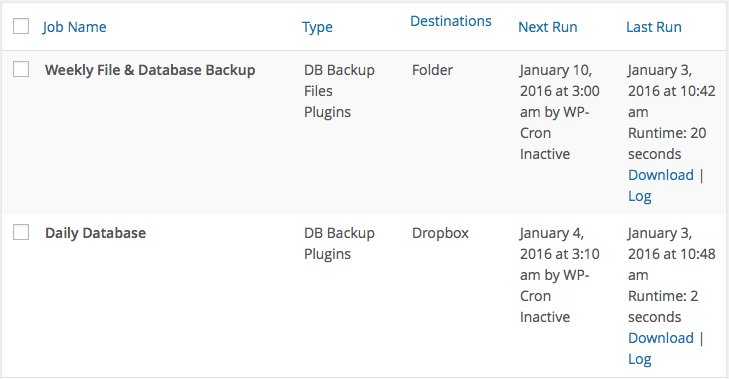
The options allow you edit, copy, delete, or run your job now. Edit will allow you to edit any aspect of your job, copy will make a copy of the job, and delete will delete the job.
If you select to copy the job, all of the settings except for the run schedule will be copied.
After you copy a job you will need to edit it and set up a run schedule.
Run now allows you to run your job right now. This is helpful if testing your backup, or if you are planning to make some changes to WordPress and need a backup taken before you make those changes.
When you create a new job, I recommend that you run it immediately. This way you will find out if there is a problem before you start to depend on the job.
Recommendations for Jobs
Now that we’ve covered in detail the various settings, which ones should you use? I recommend setting up two jobs, one that runs daily and one that runs weekly.
Weekly Job
For your weekly job, I recommend a full backup of your site. I usually keep the most recent 3-4 backups for this. This backup is for restoring my whole site if needed. If running low on space is a concern, do not backup the database tables that are included with your daily backup (since your daily backup will be run).
Note: Before updating plugins, WordPress versions, theme changes or other impacts to my site, I recommend manually running the weekly job. This way if something goes wrong, you have a backup.
Note: If you are storing to dropbox, they retain deleted files for 30 days before permanently deleting them. So really, if you have 2 weekly backups kept, you get 6 stored (2 plus 4 weeks of deleted).
Daily Job
For your daily job, I recommend just your database for most sites.
Checking Your Log
Your logs are displayed both on the BackWPup Dashboard and on the Logs page. On the BackWPup Dashboard is displayed a condensed version of the most recent jobs. This is useful for at a glance information that things are running smoothly.
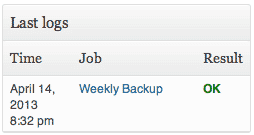
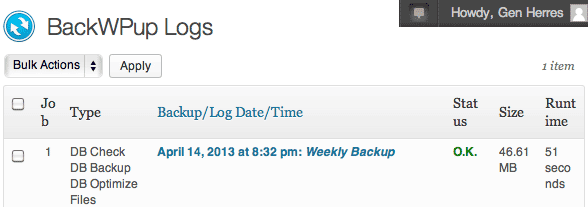
More detail can be found by going to the Logs page of BackWPup (left menu). Here you will see what types of files were backed up when the backup was taken, the status, the size of the backup, and how long the backup took. If you need additional information you can click on the name of the backup. This will provide a more detailed log, however, this log may not be easily readable for most people.
Job Doesn’t Run Correctly / Troubleshooting
Job getting stuck within the first minute
If you come across the problem where your job starts and then just gets “stuck”, then you may be using a LiteSpeed server. If this is true, your server will automatically NOT want to allow a job to go more than a couple of seconds. If you are familiar with .htaccess files and editing them, you can try adding the following line of code towards the beginning of the file (just after rewrite on):
RewriteRule .* - [E=noabort:1]
Try running your job after saving your .htaccess file with that. If that doesn’t work, you’ll need to try WordPress’s alternative scheduling system. The instructions basically say add a line to your wp-config.php file:
define('ALTERNATE_WP_CRON', true);
If neither of those work, you’ll need to contact your hosting company because it likely that they have some specific setting in place which is blocking you.
Job getting stuck after a few minutes
If your job is getting stuck after about 2 minutes, it could be because your PHP settings are too low. Generally speaking for a WordPress site, go with:
memory_limit = 128M
max_execution_time = 300
If you don’t know how to check your PHP settings contact your hosting company or webmaster.
Job suddenly stopped working
Sometimes after updates to your WP version or the BackWPup plugin, there may be an issue with the job stopping working — this is especially true for remote storage. Most likely you just need to re-authenticate with your remote storage.
Very large site
If you have a very large site you want to backup, consider breaking your job into smaller ones. For example backing up your plugins separately from your database separately from your uploads.
Running on a Windows server
WordPress & plugins can have problematic behavior on Windows servers. Switch to a Linux hosting setup.
Conclusion
BackWPup is an excellent and free backup solution which will meet the needs of most WordPress websites. They do have additional features in their paid version if you need more features than are presented here. If this information was useful or you think I missed something, let me know in the comments!
[anphira_blog_cta]


hello
When I try to archive, the toolbar gets stuck at 55% (creates archive) everytime.$the toobar under it (Compressing files as PclZip. Please be patient, this may take a moment) stops at 73%.
What can I do to complete my archive?
thanks
Pauline
Pauline, you’re server doesn’t have the resources to complete your backup. You’ll need to segment your files into multiple backups. Typically, this is because you have a lot of files in folders like uploads. Usually, you can go with backing your plugins & themes in one job and then back up your uploads folder in another job. If you still can’t complete your uploads, you’ll need to separate your uploads folder backups into individual year folders at once (take a look at your file usage to find out which are biggest).
Thank you, that was really helpful. I’m new to WP and I’m still setting up my blog.
I’ve already installed w3 total cache and have now installed BackWPup thanks to you.
I was wondering if you could perhaps give me some insight as to which plugins to add to have a healthy site and get everything working as should for traffic purposes,visitors SEO etc. I’m really struggling. I’ve read tons of articles buT I’m still not sure which to use and I already have about 11 plugins installed.
i’m just afraid because I’m not sure how to go about with the essential plugins route.
Please do assist me if possible. I Would really appreciate that because that’s the only thing that’s stopping me from launching my blog.
Hi Sharon,
I’d recommend making sure that you have security setup, iThemes Security is a great plugin for that. Also, add Yoast SEO for your basic onsite SEO needs. And of course set up your Google Search Console, Bing Webmaster Tools, and Google Analytics.
Here are a couple of links:
https://www.anphira.com/tutorial/ithemes-security-tutorial/
https://www.anphira.com/tutorial/google-website-submission-setup/
https://www.anphira.com/tutorial/yoast-wordpress-seo-tutorial/
Also, if updates in general are stressing you out, take a look at maintenance: https://www.anphira.com/services/wordpress-maintenance-updates/
If you still want to do everything yourself, check out https://www.anphira.com/checklist-wordpress-maintenance/ which also includes an email series.
How many daily backups do you keep and is there a way to automate deletion of older dailies?
Lydia,
Yes, in the To settings (destination) you can set the number of files to keep. I generally keep 2 weeks worth of files.
Hi,
So you’ll have to excuse me, I am not a developing wiz. I followed all your steps but for some reason I’m getting yellow warning errors(about 40 of them) that say “WARNING: such and such is too long to be saved as TarGZ Archive.” and then it says “WARNING: Job finished with warnings in 446 seconds. Please resolve them for correct execution.”
Should I just change the archive format? I don’t know what archive format even means so I am hesitant to change anything…. any help for a inexperienced wordpresser is very much appreciated.
The “WARNING: such and such is too long to be saved as TarGZ Archive.” means that the file names you are using are too long. This is frequently because you uploaded media to your media library and used a very long name for media the file. I’d recommend that you download the media items, update to a shorter name (something closer to 40 characters or less) and reupload it. Then update any locations using that media item and then remove the old media item with the long name.
The other possibility is that you are using a caching plugin which generates very long names. You can either change to a different caching plugin or find the appropriate settings to update how long a name your caching plugin generates.
What program would you use to save your backup file in Windows (to my computer)?
Justin, you can use any of the options for BackWPup which include syncing to a computer. For example, dropbox once installed on your computer syncs the files between your computer and your online dropbox storage. Otherwise, you can save it on your web server (the folder option) and then download the resulting file manually.
Very interesting article, it has helped me a lot! Thanx!
thank you for this well documented tutorial