If you haven’t setup 3rd party email before, it can be a bit intimidating to setup G Suite the first time. I’m going to walk you through the info you need to gather in advance and then the setup process.
Before you start
If you already have email service with another provider, you need to backup your email to a local hard drive. This can be done using a desktop email client.
When you change mail providers you will lose access to your old provider, so it’s very important that you’ve backed up your email!
Gather needed information
Once you start the setup process you want to be able to complete it reasonably quickly. So make sure that you know ALL of these things before you get started:
- Login to your DNS (generally your registrar but maybe elsewhere)
- The primary email address you want to create – this will become the “Master” of the account, so make sure you’ve decided which this should be
- Business Name
- Number of employees
- Country
- First Name that goes with the primary email address
- Last Name that goes with the primary email address
- Current email address (make sure it’s NOT at the domain you are trying to set up) – this will automatically become your recovery email address
- Domain Name
- A password (it should be strong and saved somewhere like your favorite password manager)
- Account type (generally Basic)
- Name & Address of Business
- Phone number (a cell phone that can receive text messages)
- Payment method info (credit card, expiration date, security code and FULL name on card and billing address)
- List of all people that you want to add to your account (FULL name, desired email address, and their current email address — instructions will be sent to their current email address)
Go to G Suite
Right click on the link below and open the link in an incognito window to start your 14-day free trial. Your credit card will be automatically billed after 14 days if you don’t cancel.
You want to use an incognito window because if you are logged into an account already it can go very very wrong trying to set up a new G Suite.
Creating Your Account
Now that you’ve gathered together everything in the needed information, it’s time to set up your account. Make sure that you have 20 min of uninterrupted time to do this during. Also, make sure that you’ve got someone’s referral code and 20% discount code handy (I almost always have several codes handy, leave a comment below and I’ll send you one).
First, log into the location where your DNS is managed using your same incognito window (generally your registrar, but might be Cloudflare, a hosting company, or somewhere else). Google can auto add DNS records for you at several well-known registrars but you have to already be logged in at your registrar to do this.
If you aren’t at one of the popular locations for auto-adding, or if you do not have access to the DNS, then you will need to contact the person who does with the exact content that Google needs to be added. This will delay getting your email set up.
Start your text document
If you ever have a problem with your G Suite login credentials, you will need the information that you used to sign up.
So, at every step of the process, you need to record exactly what information you used.
Set up a simple text document, or just download the template by clicking here.
Set up screens
Time to go through the setup screens.
Select your package
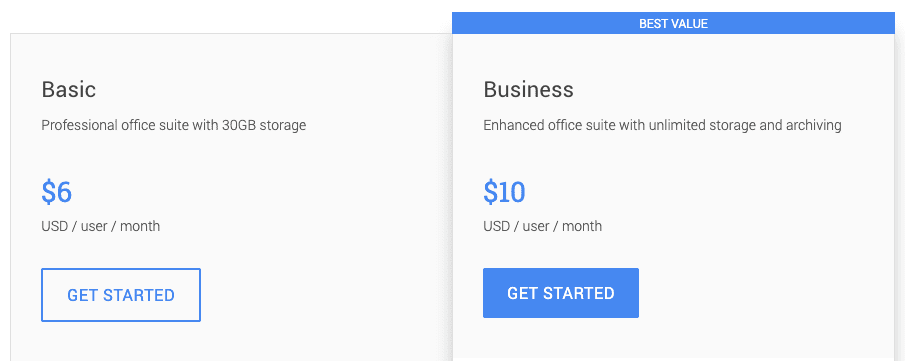
Most businesses don’t need more than the Basic package. It includes 30GB of storage, which is plenty for most folks.
If you do need more space, then and some additional administration features with Google Vault, then you should select the Business level.
Let’s get started
The first item is your business name, enter it.
Next is the number of employees. If you don’t know, just go with the number of email addresses you are creating at the moment.
And finally, on this screen, select your country and click on next.
What’s your contact info
This is going to be your administrator contact info. This needs to be an email address that is NOT associated with your domain. For example, if you have a personal @gmail.com address, that would be a great one to use here.
- First name
- Last name
- Current email address (again, your personal @gmail.com address is a great one to use here)
Does your business have a domain?
Generally, the answer is yes.
What’s your business’s domain name?
Enter your domain here, with no www or http.
- The correct way to enter the domain: example.com
- Incorrect way: http://example.com or www.example.com
Use this domain to set up the account?
This is a confirmation screen – just make sure that you didn’t make a typo spelling your domain name. Then click on next.
How you’ll sign in
Here you will create your primary account for this domain. This should be an email address that you plan to ALWAYS have for this domain. Some common ones are “info” or “office” or the first name of the business owner.
Once you hit verify it may take up to 30 seconds, this is normal, don’t panic.
Choose your payment plan
Depending on your location, this may or may not be available. If it is, you can select being paying monthly on the flexible plan or paying yearly. The choice is up to you.
Here is also where you can enter a promotion code for a discount on your first year.
Review and check out
Here you will review your information and provide your address & payment info.
The address that you enter here must match your billing address on the credit card you are using.
When you click on next from here Google will validate your credit card info, so it could take up to 30 seconds before you move to the next screen.
Your G Suite account has been created
Here you’ll be asked if you are ready to set up your domain to use G Suite. Make sure you’ve backed up any existing email accounts (if you have email addresses for this domain through another provider — if this is the first time you are setting up email for this domain, then just go ahead).
Add people to your G Suite account
Here is where you can add additional users to your account — if you selected that you don’t have any employees in the set up, then you can skip this step.
You will enter the first name, last name, and email address that you want to use for each of your employees.
When you have added them all, click on the checkbox for “I added all user email addresses currently using [your domain]”. Then click on next.
There will be a lightbox popup window which allows you to notify your existing team of their login info. I recommend that you use an email address not related to your domain to send them setup instructions.
Verify your domain and set up email
Now that you’ve added your people, you can set up your domain records. If you are using one of the supported domain companies, then Google can set up your records for you, provided that you are logged into your hosting already.
Click on verify and Google will automatically set up your DNS records.
Once you click on verify, it will take a few minutes to get your DNS set up. Frequently you can just wait here while it sets up, or you can come back later and log in with your credentials.

If you get an error message saying that it didn’t verify — it usually means that Google has set things up correctly, but the DNS hasn’t propagated. New DNS records need some time to propagate and depending on your DNS provider this can take a couple of minutes or an entire day.
If it says that you need to manually verify your domain, I recommend coming back in a few hours after your DNS has propagated.
To check that the records were entered correctly at your DNS provider, go to your DNS provider and check your records, you should see all of the following records:
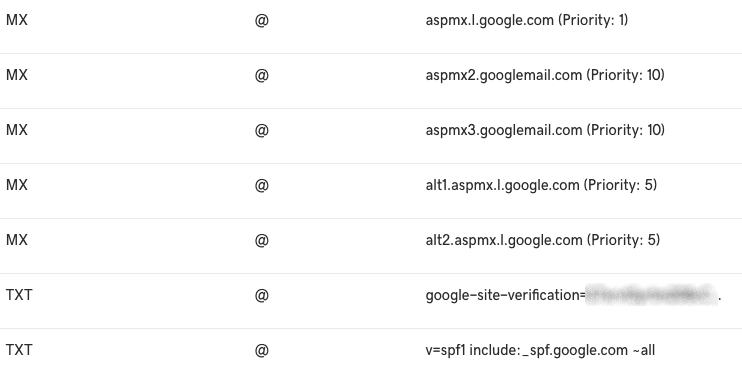
If your records look the above (DNS records displayed are on GoDaddy), then your DNS records are fine, you just need them to propagate.
Typically GoDaddy will be propagated in about 10 min, but occasionally takes longer. Cloudflare also propagates very quickly. Some DNS providers can take a full day (and some real pains can even take 2 days – although that is rare).
Once you are back, you can go ahead with the verification by selecting a TXT record.
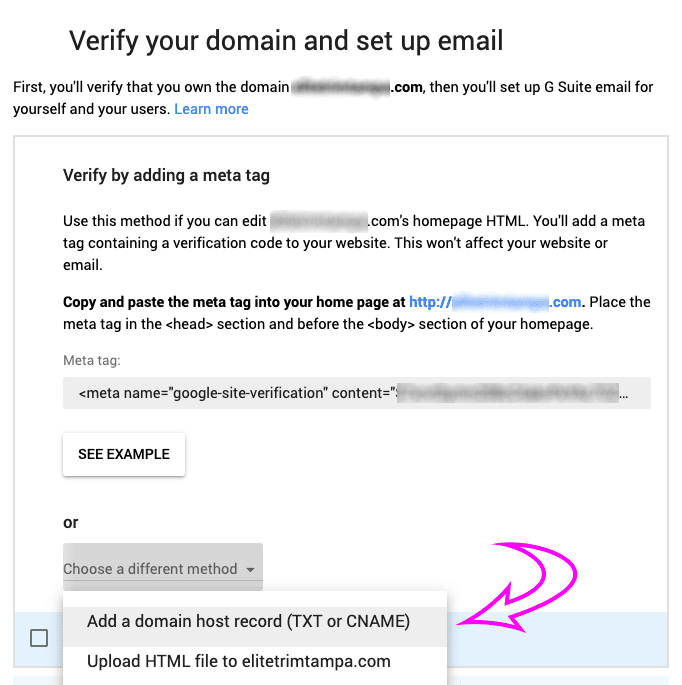
And then click all of the boxes and click on verify (you don’t need to do anything but check the boxes if your DNS records look good from the step above).
If your DNS records don’t look good from the step above, you will need to correct your DNS records.
Pick the right plan for your business
Google again makes you select your plan. Select the same option that you did at the very beginning of the process. For most businesses that will be “basic”.
Almost Done
Congrats, you’re now almost done.
Almost.
From here click on the circle icon in the upper right and select “Google Account”.
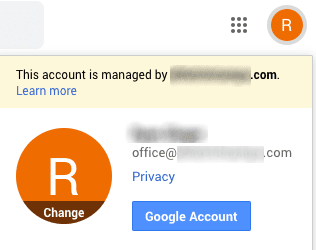
Then select “Personal info” and set up your recovery phone number. This phone number needs to be able to receive text messages.
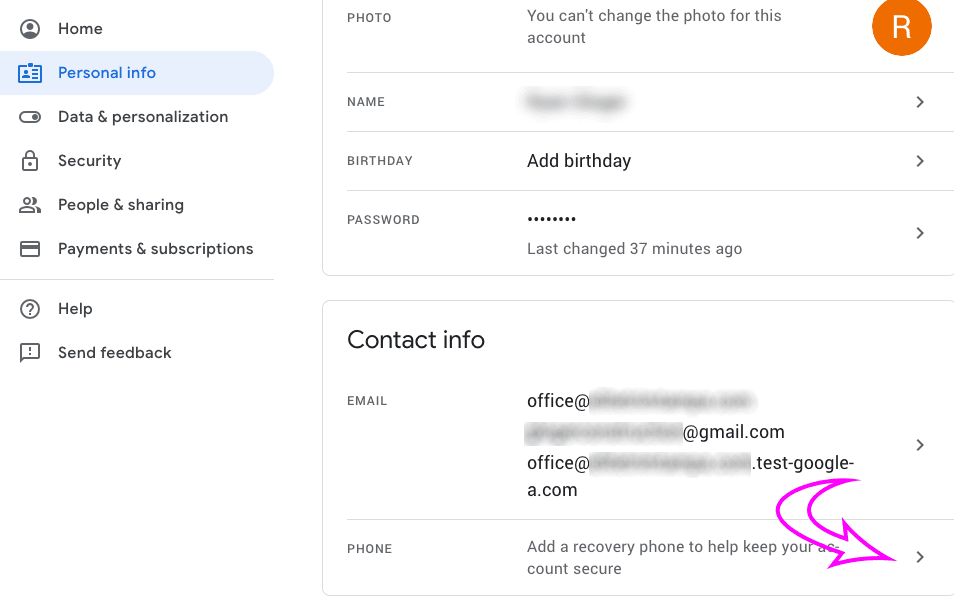
Click on “add recovery phone” and then add your phone number.

You will be asked to quickly log back in (remember you recorded the password during the setup process). Then accept the terms of use. Then enter your phone number.
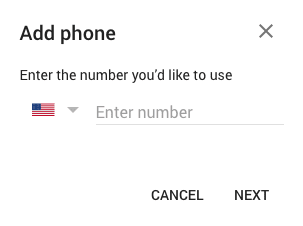
Enter your phone number, click on next and you’ll receive a text message with a verification code. Enter the verification code and you’re now done!
Additional Users
Your additional users when they log in for the first time will need to set up their own phone numbers and recovery email addresses.
Make sure that they do this immediately and don’t delay. If an employee is away, then log into their account for them for the first time and get at least their recovery email address set up.
This should be done within the first 24 hours of creating the G Suite account. If you don’t, you will end up kicking yourself repeatedly.

