Unfortunately in life our ideas for posts, our time to actually write posts, and the times that we’d like to publish them are all different. Fortunately though, there are some features and plugins to help us with that. We’ll cover how to schedule WordPress posts in this tutorial.
Getting Started
First off, I use a plugin which prevents me from accidentally publishing before I’m ready. When you press “Publish”, instead of a post publishing immediately, you get a little javascript pop-up that asks you to confirm. So, if it was an accident, you can hit cancel. I’ve talked about this plugin and some other handy writing tools in a previous post on improving the WordPress writing experience.
Setting the Scheduled Date and Time
Fortunately, scheduling a post is built right in to the WordPress content management system. Which makes it very easy to do. The first step is to click on Edit next to the Publish Now.
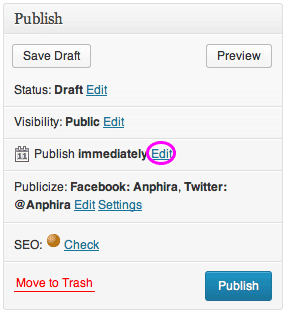
The Publish area will expand to a larger size. You can schedule a post for either the future OR the past. If you choose to schedule it for the past, the “Publish” button will remain a publish immediately.
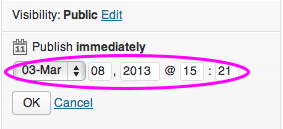
When you entered your date and time that you would like to have your blog post scheduled for, click on “OK”.
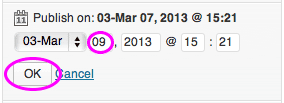
The publish module will be renamed to “Schedule for” and whatever date and time you selected. The Publish button will also change into a Schedule button. Go ahead and click on Schedule.
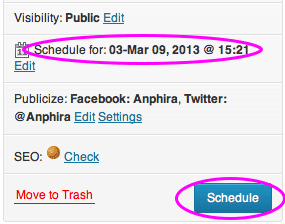
Once you schedule the post, the Schedule button will switch to an “Update” button.
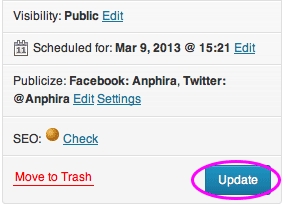
Now your post is scheduled! If you decide to change what time you would like to have it scheduled for, you can just on the “Edit” in the Schedule section. Otherwise your post will be published at the date and time you picked!
Scheduling Social Media Updates Too
Now that you’ve got your post scheduled to go out at the right time, if you’d like your social media networks to publicize the post, check out broadcasting posts on social media.
